

Entry Door Grab Handle Installation
The grab handle (introduced to Flagstaff pop-ups in 2011) can be retro-fit on older Flagstaffs with careful installation.
2011 and newer Flagstaffs* have extra blocking in the sidewall to support installation of the grab handle. Adding this support would mean tearing apart and reassembling the wall. Although this is the strongest and most correct way to retro-fit a grab handle to a pre-2011 camper it's also the least practical method.
Rather than tear the wall apart the camper's existing frame can be used if the grab handle is installed following these instructions:
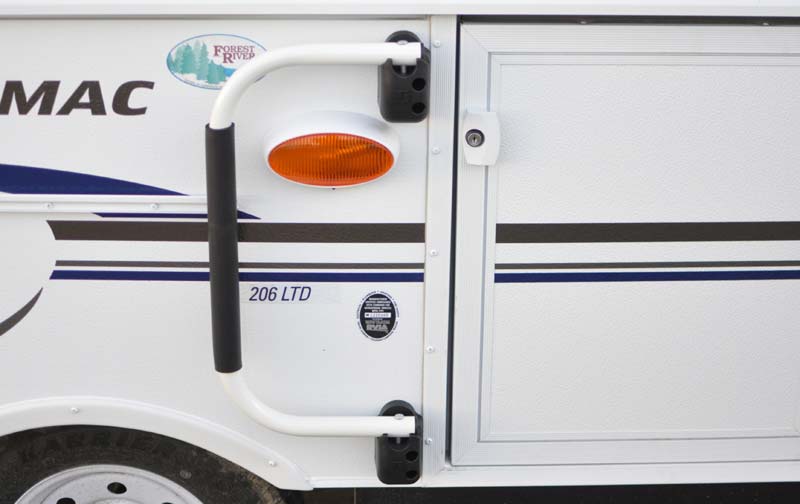
- Place the grab handle on the body panel near the door. (NOTE: on some models the patio light may need to be moved down and to the left to make room for the handle base)
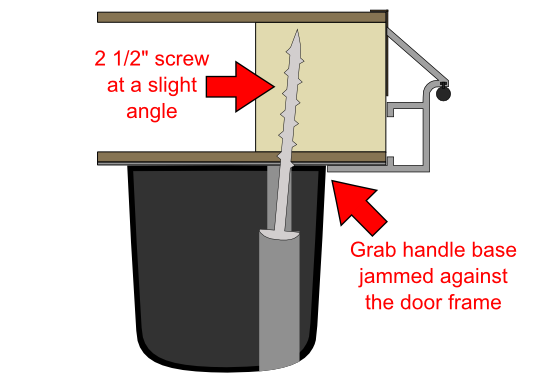
- For two-piece doors: slide the handle against the door frame as close as it will go (the base of the grab handle fixture will be touching the door frame).
For one-piece doors: slide the handle against the travel door as close as it will go (but still allow the travel door to open and close). - Be careful that any porch lights or exterior fittings already attached to the camper will not interfere with the grab handle's operation.
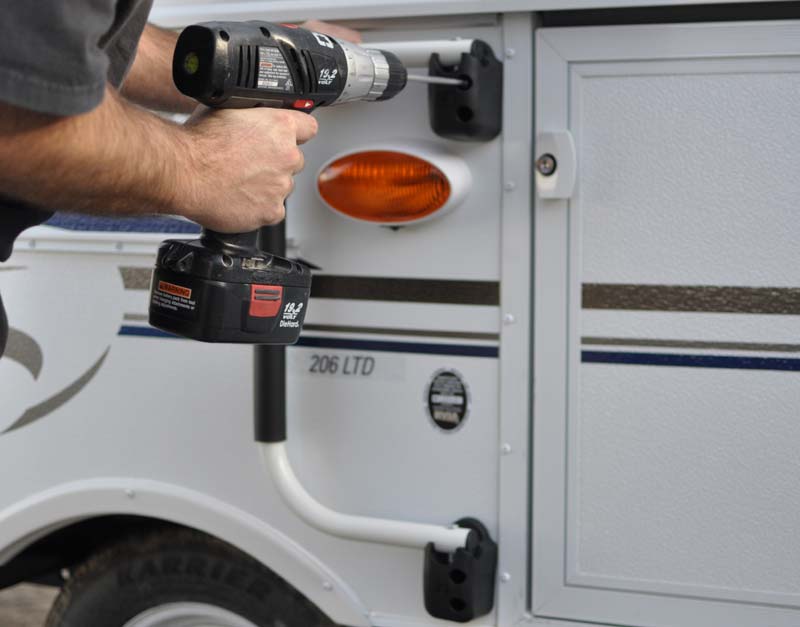
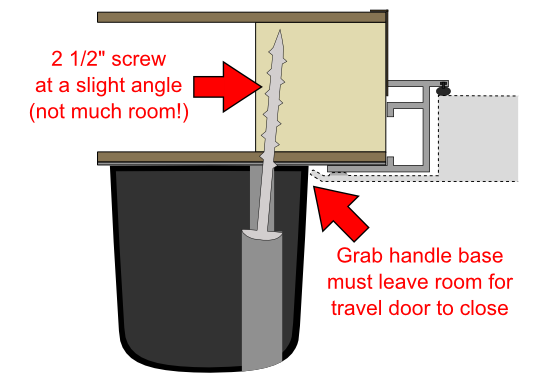
- Attach the grab handle with 2 1/2" #10 screws.
IMPORTANT! Angle the screws towards the door frame slightly such that the screws can bite into the wood frame as much as possible. If the screws do not have enough support in the existing wood the grab handle will be weak and could detach from the camper at a most inopportune time. This is particularly important with a one-piece door because the travel door forces the grab handle base away from the door frame.
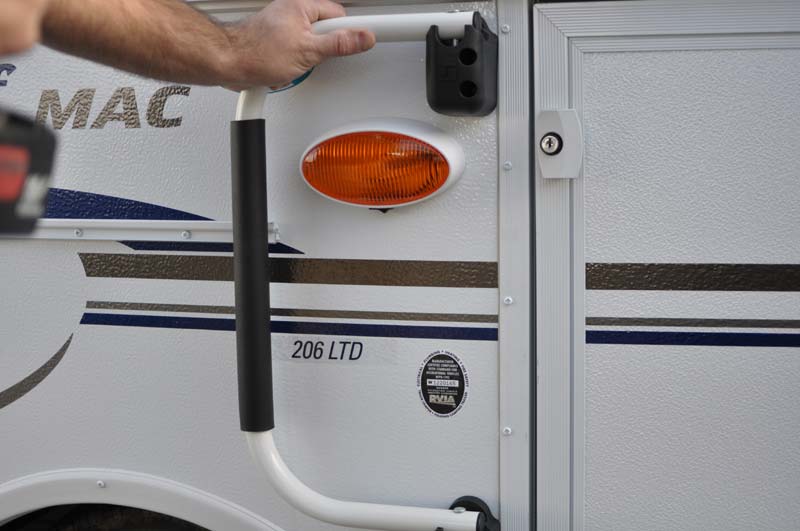
Place handle against the door frame.
Angle the screws slightly towards the door (see below for cross-section) to bite into as much wood as possible.
![]() Test the installation (Ask a co-worker? A teenager? That neighbor who took two years to return your grill?) to make sure the handle is sturdy before using it on an actual camping trip where the nearest medical care could be many miles away.
Test the installation (Ask a co-worker? A teenager? That neighbor who took two years to return your grill?) to make sure the handle is sturdy before using it on an actual camping trip where the nearest medical care could be many miles away.
One-piece door cross-section
Two-piece door cross-section (LTD Series)
Manufacturer's Instructions
Here's the text that comes with the grab handle from the handle's manufacturer, Stromberg Carlson Products Inc.:
WARNING: This rail will help you maintain your balance. It is not designed to break your fall, but prevent it. Please always maintain contact with this rail when entering and leaving your RV.
Your Lend A Hand railing has been shipped to you pre-assembled. Please pivot the hardware on the rail to guarantee the integrity of the assembly. This assembly will only support you in accordance to how it is attached to your unit. The holes are off set towards your door to help you attach your rail to a stud. If no sstud is available you may have to drill through the wall of your coach and back long bolts (not provided) with extra large washers or a plate.
![]() Back to Parts
Back to Parts
*The LTD series is the sole exception after 2011 but the procedures detailed on this page can be used to install a grab handle on the LTDs.
Privacy © 2009-2025 Roberts Sales. All rights reserved.